OVA/OVF Deployment Using govc CLI
![]() Deploying an OVA/OVF is a typical operation in a vSphere environment, and VMware administrators have plenty of options for that: using the VMware Web or HTML5 clients or techniques based on OVF Tool such as PowerCLI or Ansible. Recently, I have been using the govc CLI when I had to do a basic OVA deployment.
Deploying an OVA/OVF is a typical operation in a vSphere environment, and VMware administrators have plenty of options for that: using the VMware Web or HTML5 clients or techniques based on OVF Tool such as PowerCLI or Ansible. Recently, I have been using the govc CLI when I had to do a basic OVA deployment.
Why precisely this method over a different one? Deploying OVA through the UI can be frustrating (especially when you have unknown errors, or after a vSphere upgrade) and time-consuming. In comparison, govc is easy to use, platform agnostic (supports macOS, Windows and Linux), works without ovftool and seamlessly if you import to vCenter or ESXi hosts.
Note: OVF Tool is still VMware’s recommended way for deploying OVA, as it contains unique functionalities and options that cannot be found anywhere else.
Starting with govc
The govc CLI is a statically compiled vSphere CLI built on top of govmomi, a Golang library for interacting with VMware vSphere APIs (ESXi and/or vCenter). The CLI is designed to be a user-friendly CLI alternative to the GUI and well suited for automation tasks.
I won’t describe the installation, as you can find everything on GitHub. Note: technically, it’s not even an installation as you will find prebuilt govc binaries for your system.
Once the executable is present on your system, you can run govc to verify that the binary is working:
rdecker ~/D/P/D/GO-DeployNSX λ
\❯ govc
Usage of govc:
about
about.cert
cluster.add
cluster.change
cluster.create
cluster.group.change
cluster.group.create
cluster.group.ls
...
Running govc without argument lists all available commands. You can also find them here.
The next step is to connect to a vCenter Server or an ESXi host. You can either specify that information directly in the CLI, or set a couple of environmental variables: the latter is easier if you plan to run more than a single command when connected to a specific vSphere environment.
GOVC_INSECURE: Disable certificate verification.GOVC_URL: URL of ESXi or vCenter instance to connect to. The URL scheme defaults tohttpsand the URL path defaults to/sdk.GOVC_USERNAME: USERNAME to use if not specified in GOVC_URL.GOVC_PASSWORD: PASSWORD to use if not specified in GOVC_URL.
While doing that, we can take the opportunity of defining additional variables to describe the environment you plan to deploy to (datastore, network, etc.).
GOVC_DATACENTERGOVC_DATASTOREGOVC_NETWORKGOVC_RESOURCE_POOL
I store all environment variables in files so that I can just quickly export those variables to connect to different environments. Example below to connect to one of my lab:
#!/bin/bash
export GOVC_INSECURE=1
export GOVC_URL=https://10.51.10.11/sdk
export GOVC_USERNAME=administrator@vsphere.local
export GOVC_PASSWORD=VMware1!
export GOVC_DATASTORE=LAB-EQL-iSCSI03
export GOVC_NETWORK=VMNET-1251
export GOVC_RESOURCE_POOL=/Z51-MGMT/host/DEPLOY-CLUSTER/Resources
Once connected, you can run commands to retrieve information about specific objects in your environment, and much more.
rdecker ~/D/P/D/GO-DeployNSX λ
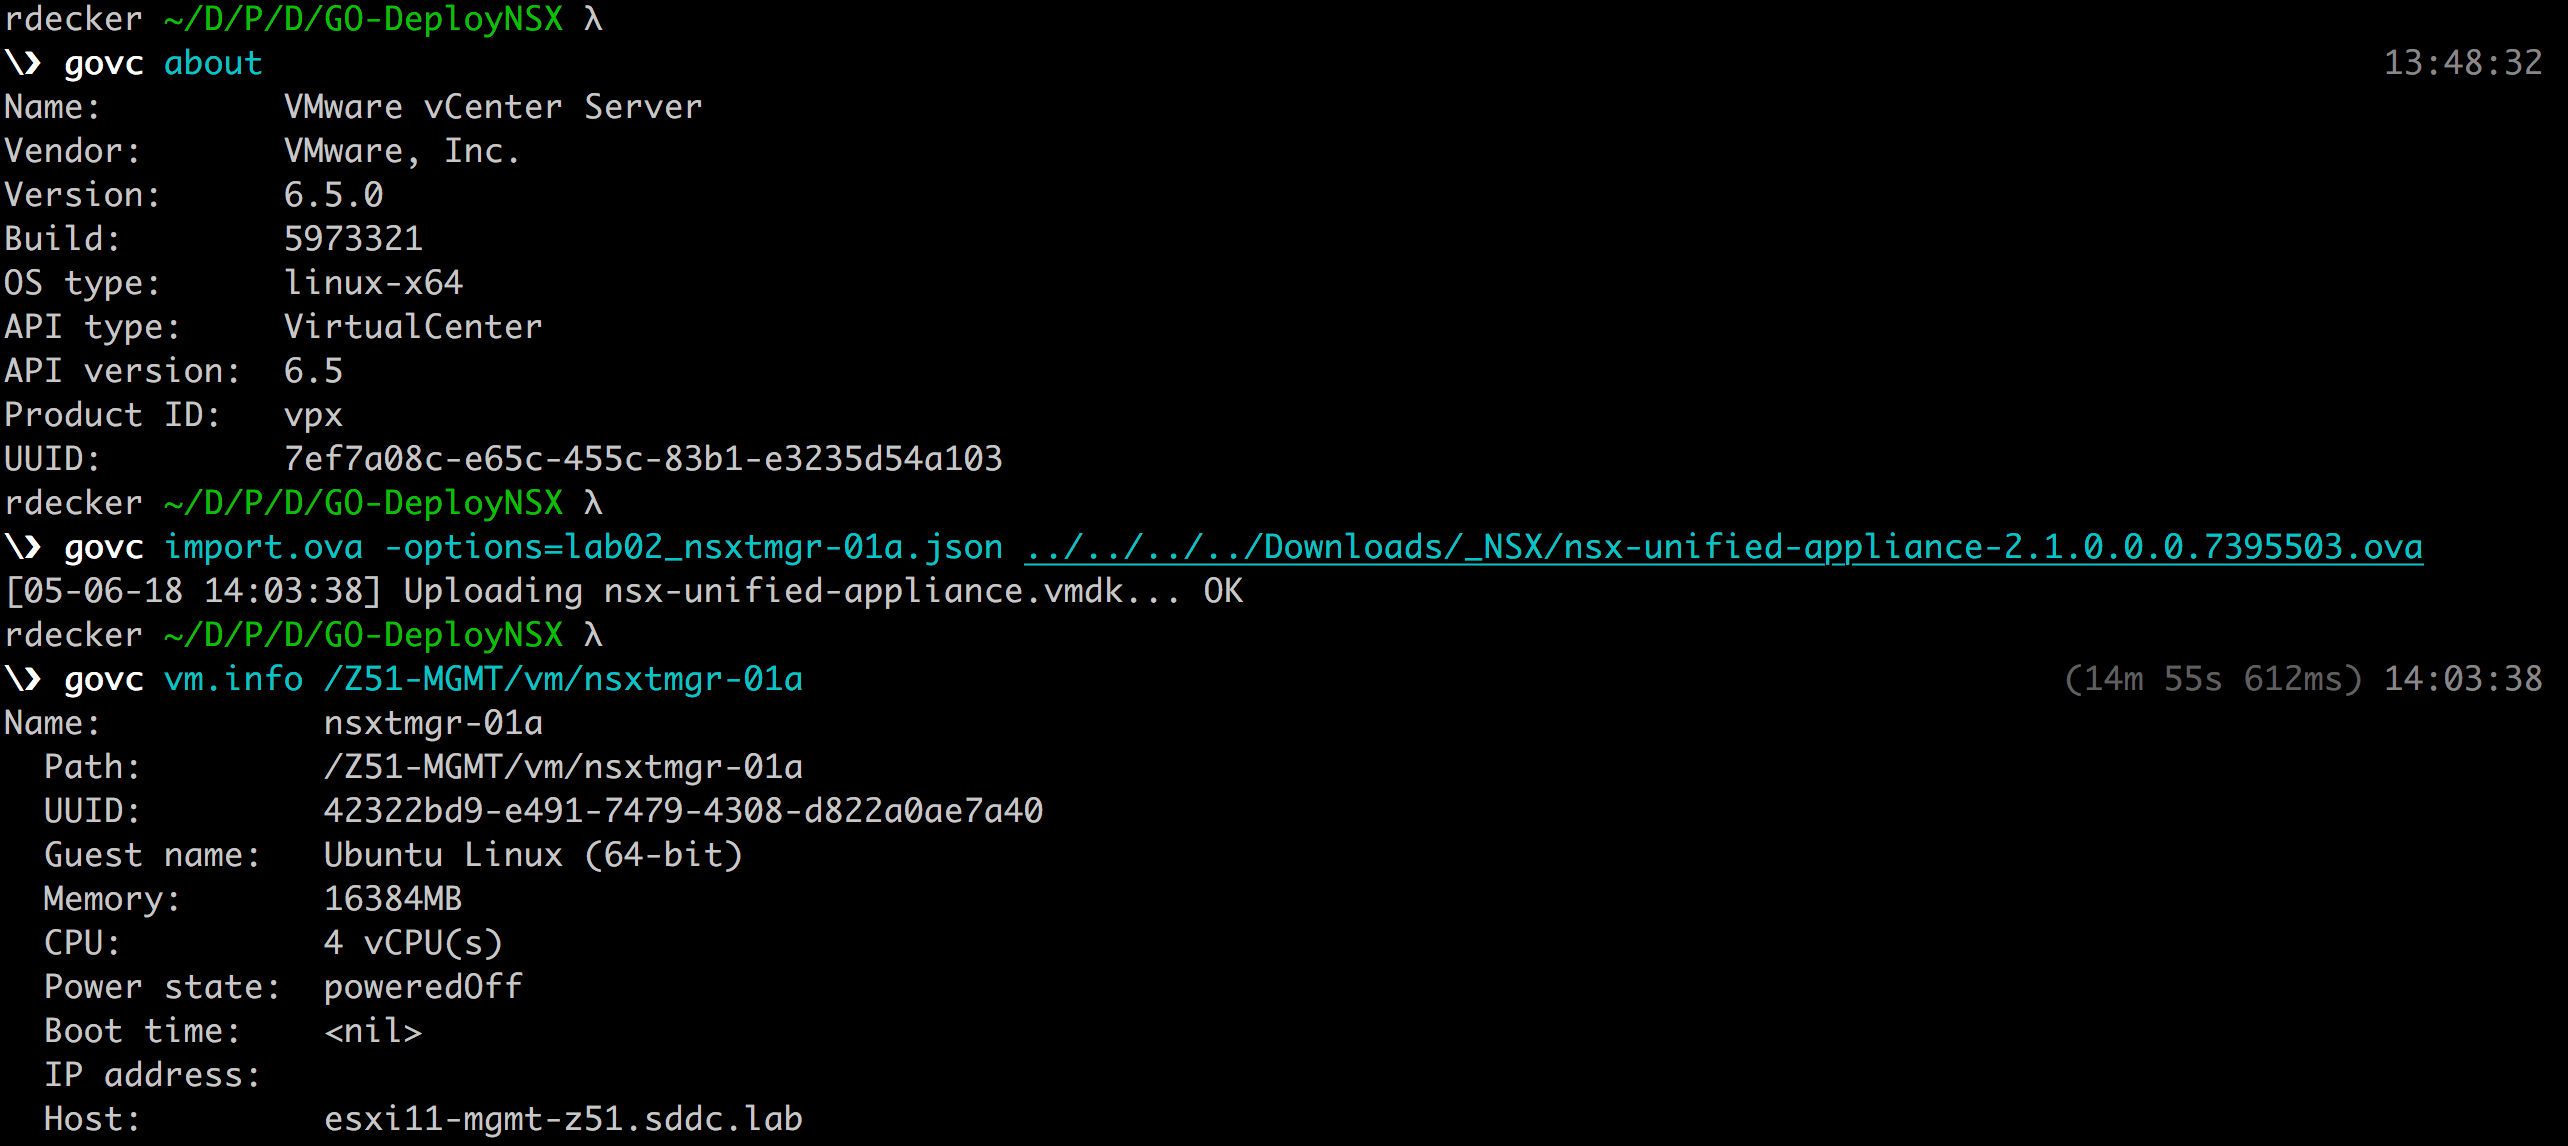
\❯ govc about
Name: VMware vCenter Server
Vendor: VMware, Inc.
Version: 6.5.0
Build: 5973321
OS type: linux-x64
API type: VirtualCenter
API version: 6.5
Product ID: vpx
UUID: 7ef7a08c-e65c-455c-83b1-e3235d54a103
rdecker ~/D/P/D/GO-DeployNSX λ
\❯ govc host.info --host.ip=10.51.10.23
Name: esxi11-mgmt-z51.sddc.lab
Path: /Z51-MGMT/host/DEPLOY-CLUSTER/esxi11-mgmt-z51.sddc.lab
Manufacturer: Dell Inc.
Logical CPUs: 32 CPUs @ 2800MHz
Processor type: AMD Opteron(tm) Processor 6320
CPU usage: 2980 MHz (3.3%)
Memory: 131046MB
Memory usage: 43390 MB (33.1%)
Boot time: 2018-05-31 07:59:35.336747 +0000 UTC
State: connected
Deploying NSX-T Manager OVA using govc
The govc CLI can create a JSON file from an OVA, which can be used (after edition of course) to deploy the OVA. This section focus on how to deploy NSX-T Manager OVA appliance using govc as an example.
The first step is to get the specifications by inspecting the OVA using the import.spec command. Note: you can format the JSON output using python for a better readability.
govc import.spec ../../../../Downloads/_NSX/nsx-unified-appliance-2.1.0.0.0.7395503.ova | python -m json.tool > nsx-manager.json

You can now edit the ‘nsx-manager.json’ file and fill in the settings to match the desired deployment.
Note: the ‘IPAllocationPolicy’ parameter is set by default to DHCP. If you want to use a static IP, you can replace ‘dhcpPolicy’ by ‘fixedPolicy’.
I recorded this step using asciinema to give an idea on how fast this can be done.

The final step is to deploy the OVA using the import.ova command and specifying an options spec file path using the ‘-options=nsx-manager.json’.
govc import.ova --options=nsx-manager.json ../../../../Downloads/_NSX/nsx-unified-appliance-2.1.0.0.0.7395503.ova
Note: this step was also recorded using asciinema.
That’s it! You can now continue with the configuration of the appliance. :)
Resources: