Upgrading to NSX-T 2.3.1
Time spent in airports and lounges can be used for various things, but I generally take the advantage not only to catch up on emails but also to work on things that I can “fire and forget” (such as upgrades in my lab).
Last Saturday, I missed a connection and was stuck at JFK airport for quite a while. I took the opportunity to upgrade one of my deployment to NSX-T 2.3.1 and PKS 1.2.4. NSX-T 2.3.0 was already in place, but I was facing one issue that NSX-T 2.3.1 is solving so I had to upgrade.
Before starting any NSX-T upgrade, you should verify that the NSX-T environment is in a healthy state and perform a backup. Check also the NSX-T Data Center Upgrade Guide in the NSX-T documentation where you will find all useful and required information (such as an upgrade checklist, detailed upgrade process or post-upgrade tasks). Finally, don’t forget to validate the following:
NSX-T upgrades are quite straightforward thanks to the upgrade coordinator which guides you through the proper upgrade sequence. It is a self-contained web application (running in the NSX Manager) that orchestrates the upgrade process of NSX components (hosts, edges, control and management plane).
First, I used the vmw-cli from my jumpbox to download the VMware-NSX-upgrade-bundle-2.3.1.0.0.11294271.mub file. You can check my previous article if you are interested in how to use the vmw-cli CLI client.
The next challenge was to know how to upload the quite large (7.4GB) .mub file to the NSX Manager. I only have a Linux jumphost in this lab, with no graphical interface. However, you can upload the MUB file from a remote location. Fortunately, running a temporary web server that serves static files can be done very easily with Docker:
docker run --name nginx-static -v /home/downloads:/usr/share/nginx/html:ro -p 8080:80 -d nginxNote: I used the 8080 port as my standard HTTP port was already in use on my Linux jumpbox.
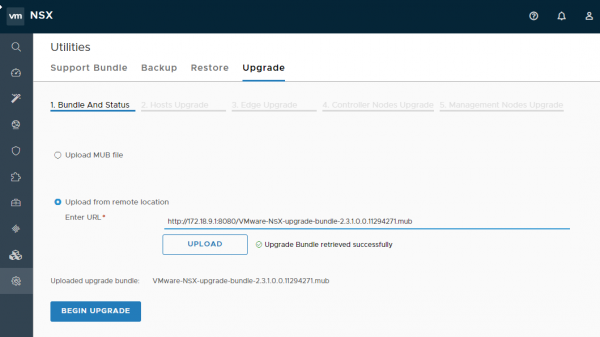
The next step was to provide the full URL to the MUB file (see below) before beginning the upgrade.
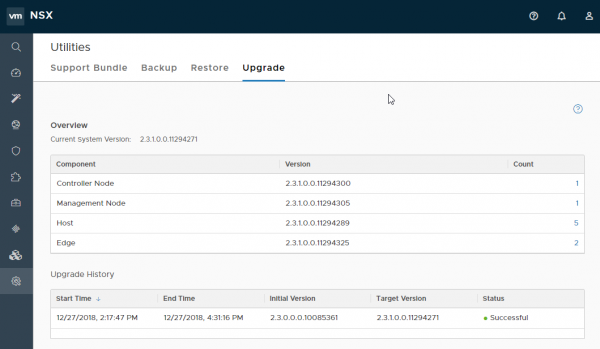
Once uploaded, you just have to watch the upgrade sequence and click Next from time to time. :)
Yes, it’s that simple! :)


