#10 Things To Know Before Starting with NSX-T
NSX-T 2.0 is available for 2 months now and I have played with it quite a lot since that moment. There are a lot of differences between NSX-T and NSX-V and I thought I could share a few tips you should know before starting with NSX-T.
- Geneve, not VXLAN or STT
- Recommended MTU
- NSX-T VIBs
- Controllers Are Always Required
- Deploy Controllers Sequentially
- NSX Edge Cluster
- Where to Run VM-based Edges
- Respect NSX-T System Requirements
- Uplink Names in Uplink Profiles
- Compute Managers: What, When and Why?
- Don’t Try to Compare NSX-T with NSX-V
If you’re interested in the rationale behind each tip, please check below.
Geneve You Said?
NSX-T 1.1 introduced Geneve protocol to establish tunnels across the transport nodes to carry overlay traffic. Geneve replaces STT protocol used in the earlier release. Geneve stands for Generic Network Virtualization Encapsulation and is a new encapsulation method co-authored by VMware, Microsoft, Red Hat and Intel; at the time of this writing, Geneve is still an IETF draft.
Geneve is designed to support network virtualization use cases, where tunnels are typically established to act as a backplane between the virtual switches residing in hypervisors, physical switches, or middleboxes or other appliances.
Notes:
- NSX for vSphere will continue to leverage VXLAN.
- When we say VTEP with NSX-T, it refers to Virtual Tunnel End Point.
- You can also use TEP (for Tunnel End Point)
MTU
When leveraging encapsulation technologies, it is important to increase the MTU supported both on transport nodes as well as on all interfaces of the devices deployed in the physical network. For NSX-T, the documentation refers to a preferred MTU size of 1600 or above.
Actually, my personal recommendation is 9000: why bothering increasing to 1600 when you can do 9000? It’s only a maximum after all! :)
Different possible scenarios have different requirements:
- When leveraging NSX-T only for the distributed firewall, you don’t need to increase the MTU. Nevertheless, I always recommend it for long-term plans (in case of network virtualization is introduced later).
- When you want to carry overlay traffic for network virtualization, increasing the MTU to a minimum of 1600 bytes is recommended (same rule as NSX-V).
VIB
Compared to the 1 (or 2) VIB installed by NSX-V (depending on the version: esx-vxlan and esx-vsip up to NSX-V 6.3.2, and esx-nsxv from NSX-V 6.3.3 onwards on ESXi 6.0 or later), you have now 23 VIBs that get installed when you create a fabric node in NSX-T.
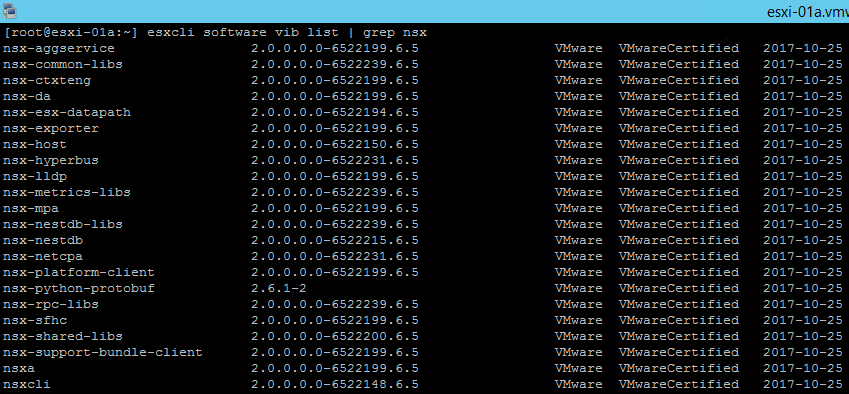
Some of them are described in the documentation.
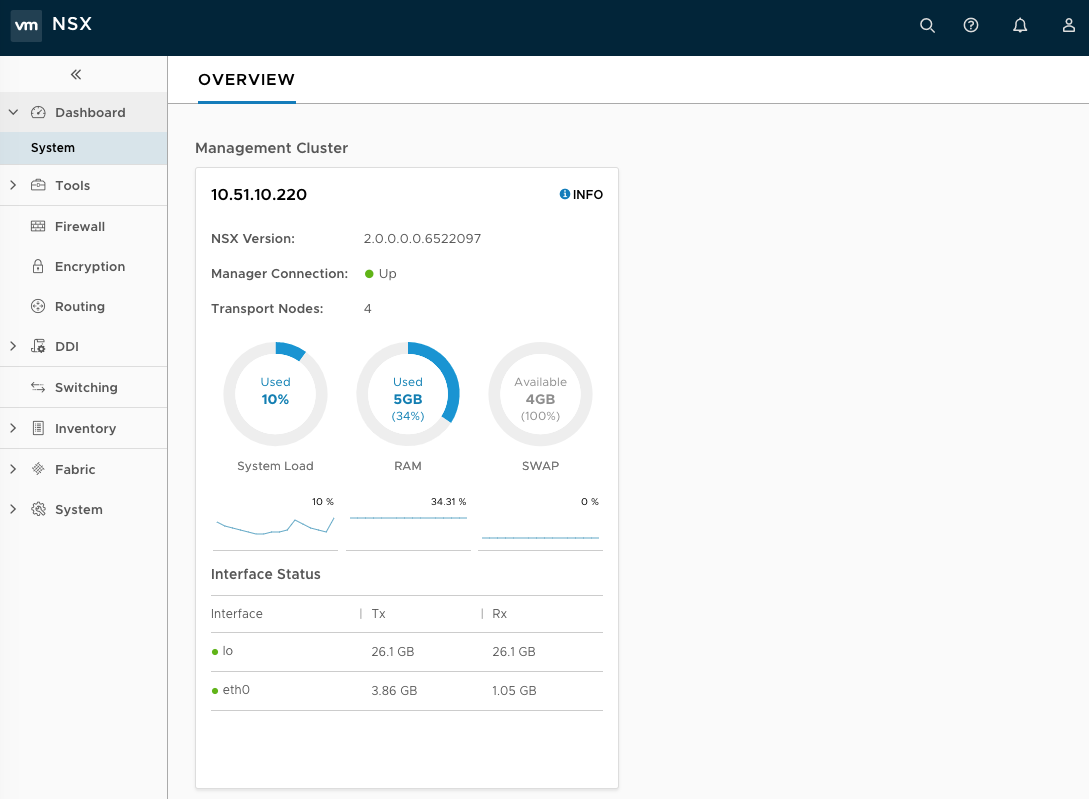
Controllers Are Always Required
NSX Controller is deployed as a cluster of highly available virtual appliances that are responsible for the programmatic deployment of virtual networks across the entire NSX-T architecture. The set of objects that the control plane deals with include VIFs, logical networks, logical ports, logical routers, IP addresses, etc.
With NSX-T, the controller cluster is not an optional component to deploy as it is required for multiple functions (including the distributed firewall). Distributed firewall policies are pushed to the controller cluster which will convert the objects used in the rule definition into IP addresses before programming the data-path (policies using IP addresses pushed to hosts).
Deploy Controllers Sequentially
Due to its nature and because the deployment involves multiple manual steps, I recommend proceeding in sequential steps to deploy the NSX controller cluster to avoid situations having multiple masters.
- Deploy first the 3 controllers
- Join all controllers to the NSX Manager
- On the controller supposed to be the master, set the shared secret and initialize the control cluster
- Join the additional NSX controllers with the master
NSX Edge Cluster
If you see the terminology NSX Edge Cluster, it might not be the edge cluster you think about. :) In NSX-T, the edge nodes (VM-based or bare metal) can be grouped into a pool of capacity (known as edge cluster) to provide scale out, redundant and high-throughput gateway functionality for the logical networks. It has nothing to do with a vSphere edge cluster where you run your NSX edges.
Where to Run VM-based Edges
You can deploy VM-based edges on standalone hosts, or hosts belonging to a cluster (such as vSphere cluster). Although the documentation says otherwise, I wouldn’t deploy a VM-based edge on a host transport node to avoid confusion when doing troubleshooting. Indeed, the VTEP is terminated in the edge node itself, and not on the host.
Respect NSX-T System Requirements
This should not even be mentioned here, as you are always respecting system requirements. :) Nevertheless, for the sake of completeness, I thought I could remind it to everyone. Beside usual resources requirements, NSX-T has specific requirements for:
- Hypervisor supported (vSphere 6.5 GA and U1, RHEL KVM and Ubuntu KVM)
- CPU and NIC supported for NSX Edge and Bare-Metal NSX Edge
- NIC supported for Bare-Metal NSX Edge
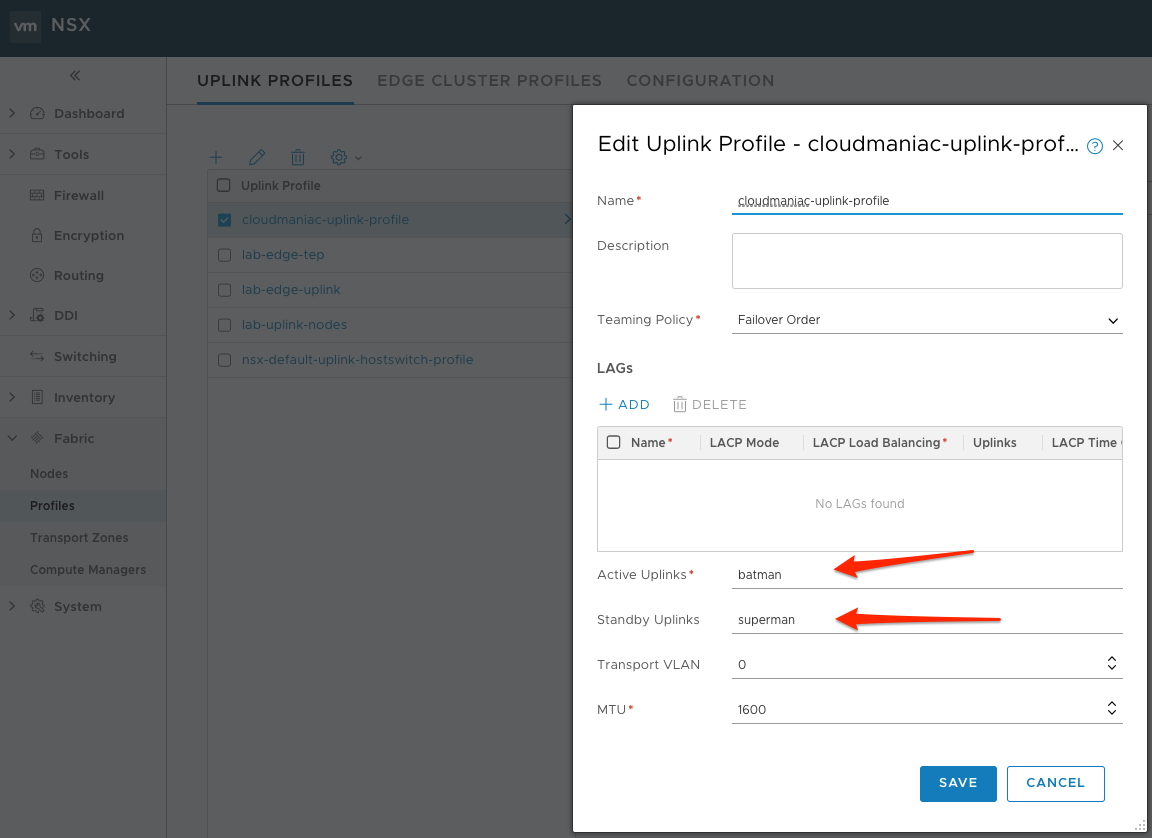
Uplink Names in Uplink Profiles
An uplink profile defines policies for the links from hypervisor hosts to NSX-T logical switches or from NSX Edge nodes to top-of-rack switches. When creating or editing an uplink profile, be advised that the ‘Active Uplinks’ and ‘Standby Uplinks’ fields are only labels. In the example below, I assigned the values to ‘batman’ and ‘superman’.
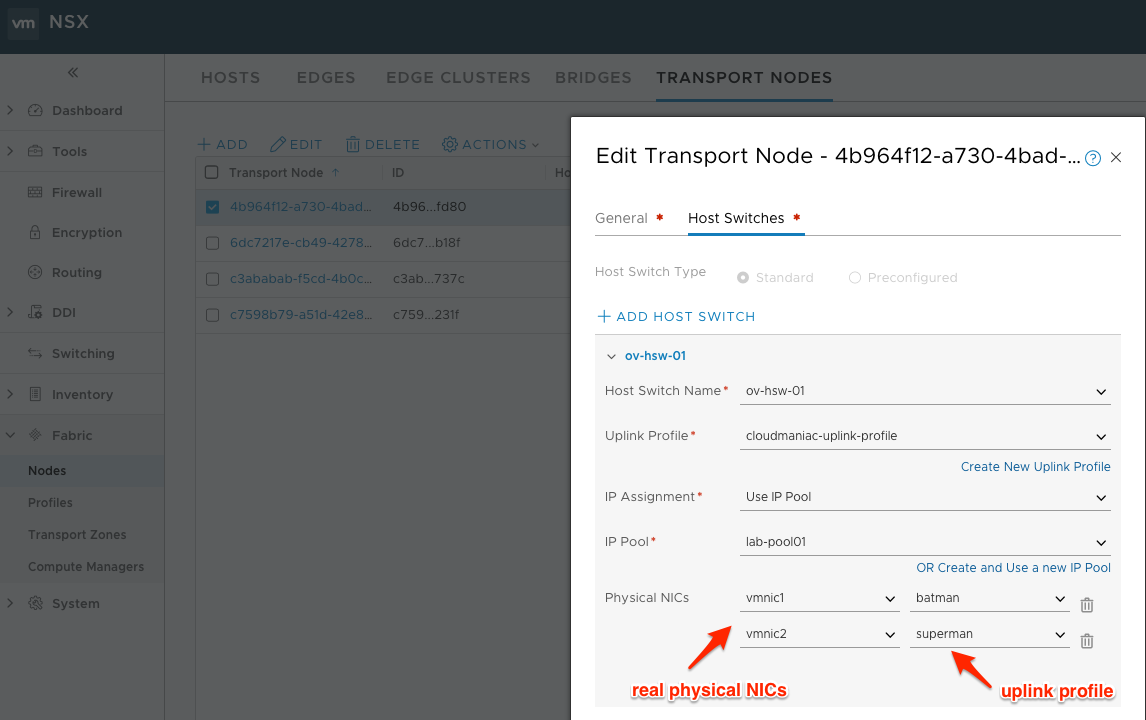
Where you really assign your physical NICs is when you create (or edit) your host transport node. In the example below, I assigned the physical NICs vmnic1 and vmnic2 to the batman and superman uplink names in the corresponding uplink profile.
Compute Managers: What, When and Why?
A compute manager is an application that manages resources such as hosts and VMs. NSX-T polls compute managers to find out about changes such as the addition or removal of hosts or VMs and updates its inventory accordingly. It can also be used to deploy VM-based edges or automate the installation and creation of transport nodes on all the NSX-T hosts instead of configuring manually.
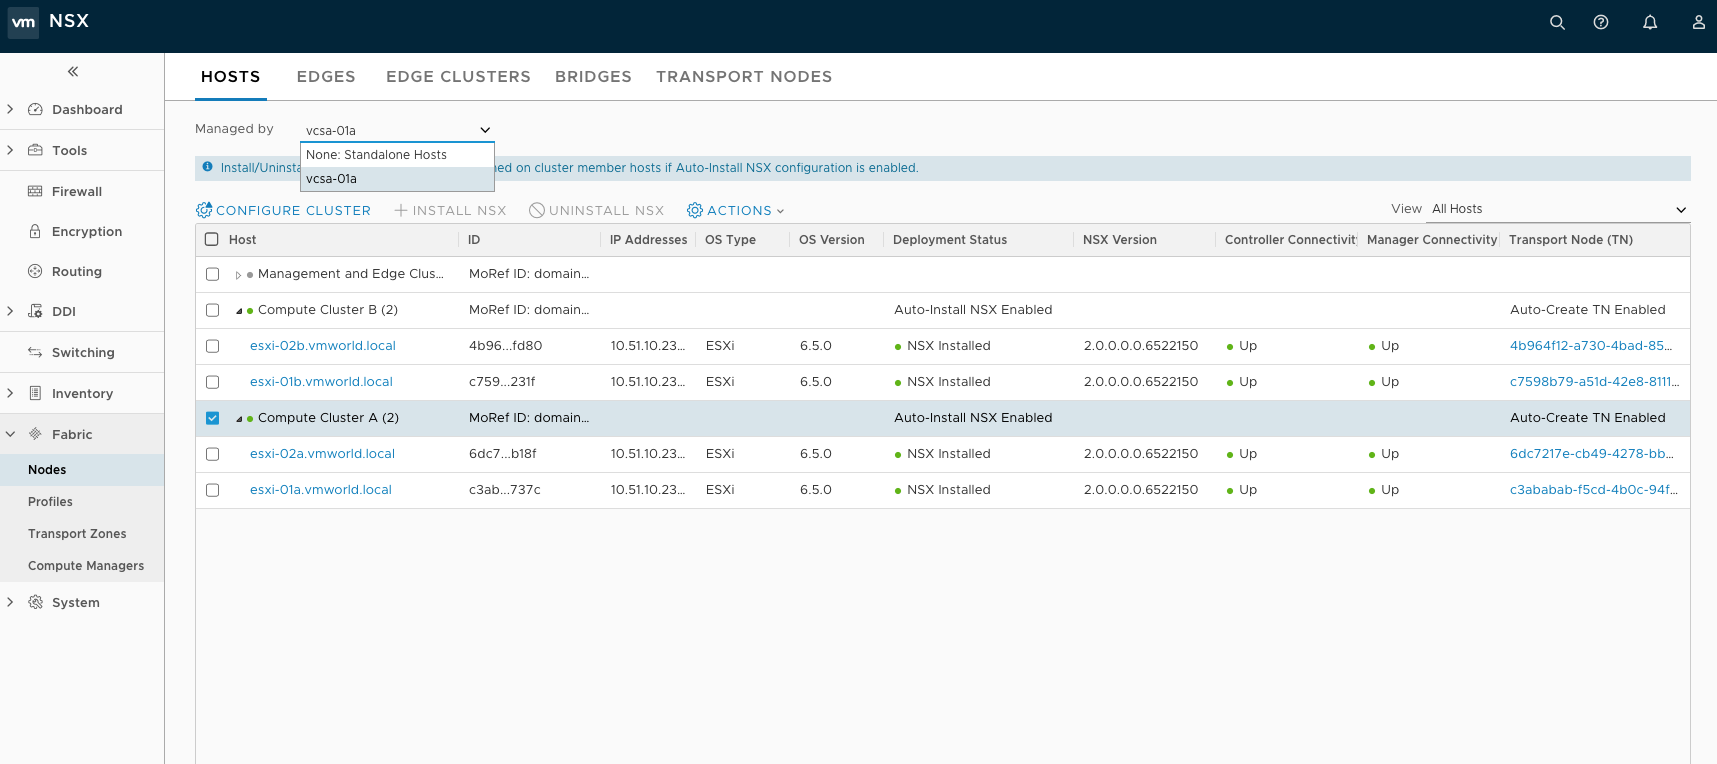
Only vCenters 6.5 (GA and U1 only) can be added as compute managers and you can have a maximum of 5 compute managers in NSX-T 2.0. However, this doesn’t represent a limitation in the number of hosts in your environment, only how you can interact with them.
When to use compute manager is up to you. Most of the time, you can use it to automate the installation and creation of transport nodes but also for edges deployment. Nevertheless, there are some situations where it can be useful to manage the hosts individually:
- If you have only KVM hosts
- If you have a mix between vSphere and KVM hosts
- If the hardware configuration is not homogeneous between hosts in a vSphere cluster (and thus physical NICs names not homogeneous)
- If you need more granularity for uplinks because of ToR configuration
- If you have a vSphere stretched cluster (vSphere Metro Storage Cluster or other exotic deployment)
Don’t Try to Compare NSX-T with NSX-V
Actually, after finishing my article I added this 11th item. Self-explanatory title, no? :)
I know I referred multiple times to NSX-V, but now that I’m thinking about it, it’s easier to learn NSX-T when you don’t try to compare everything with NSX-V (especially in the routing area).